Installing Wishlist on Shopify Theme
When you install a Shopify app, you do so on your live (production) theme. Because of that, it’s a little tricky to configure and try the app out on a dev theme before moving it to production.
Installing Wishlist Hero on a new development copy of your live theme
If you want to install Wishlist Hero on a brand new copy of your live theme, it’s a pretty straight-forward exercise. Click the links for detailed instructions for each step.
- Install Wishlist Hero on your live theme via the Shopify App Store
- Create a development copy of your live theme
- Disable Wishlist Hero on your live theme
Installing Wishlist Hero on an older dev theme
If you need to install Wishlist Hero on a dev theme you’ve had around before you installed Wishlist Hero, the process is slightly more complicated:
- If you haven’t already, install Wishlist Hero on your live theme via the Shopify App Store
- Disable Wishlist Hero on your live theme
- Copy Wishlist Hero application files over from your live site
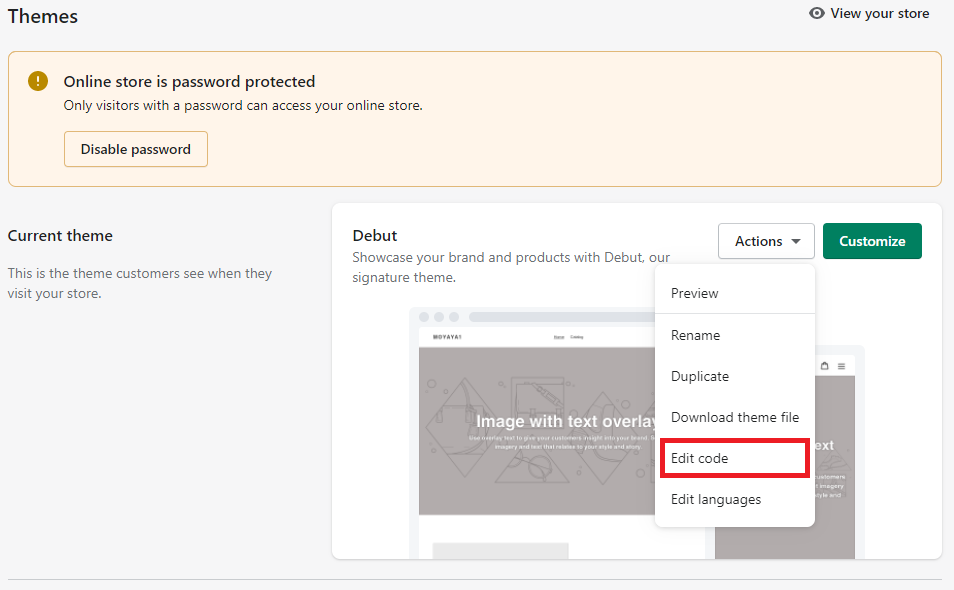
How to disable Wishlist Hero on your live theme
- In the admin console, go to Online Store > theme
- Choose the Current theme/ Production theme
- Click on Action> Edit Code
- In the “Search files” tab on the left, look for “theme.liquid” file and open it
- Search for the line of code:
- Comment this code out. This can be done by replacing the above line with this instead:
{% comment %}{% render ‘wishlisthero-styles.liquid’ %} {% endcomment %}Now Wishlist Hero is disabled for your Production theme/Current theme. When you feel like you are ready to re-enable the app on the theme, just retract the comment and replace it back to:
How to copy Wishlist Hero application files over from your live site
To install Wishlist Hero, you need to add four snippet files to your new theme.
Open your live theme in a new tab
- In the admin console, go to Online Store > theme
- Choose your live theme
- Click on Action> Edit Code
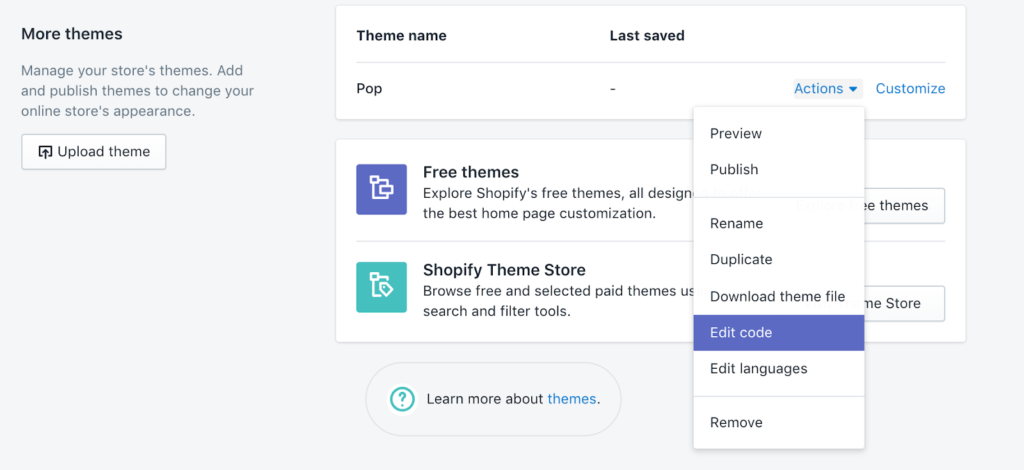
Open the dev/unpublished theme in a new tab
- In the admin console, Go to Online Store> theme
- Choose the unpublished theme you would like to enable the app for (in the “More themes” section)
- Click on Action > Edit Code
- In the dev theme, on the “Search files” tab, look for the theme.liquid file and open it
- Add code:
{% render 'wishlisthero-styles.liquid' %}into the theme.liquid file. We recommend that you add it before the </head> tag to make sure it is within the store.
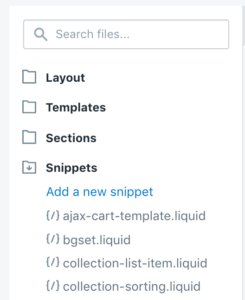
- On you dev theme, now create a new snippet.
- In the “Edit Code” section, look for Snippets, click on it and select “Add a new snippet”
- In the “Edit Code” section, look for Snippets, click on it and select “Add a new snippet”
- Name the snippet ‘wishlisthero-header-icon.liquid’ and click on create a snippet.
- Now your “wishlisthero-header-icon.liquid” file is created and it will open an empty file on the editor
- You must now copy the content of the snippet from the Current theme/Production theme onto the Dev theme
- Go to your Current theme/Production theme tab on the browser that you previously opened
- On the search tab, Look for “snippets/wishlisthero-header-icon.liquid” and open it.
- Select all the contents of the file and copy it
- Go back to the browser tab with the dev/unpublished theme.
- Paste the contents you just copied into this blank file.
- Click Save on top right corner to make changes permanent.
- You will need to do the above steps for the remaining 3 files.
- snippets/wishlisthero-styles.liquid
snippets/wishlisthero-custom-button.liquid
snippets/wishlisthero-collection-product.liquid
You are done! Your wishlist from the production theme is now applied on to your dev/unpublished theme. You can preview the unpublished theme to make sure all the configuration settings and UI layouts are as desired before going live.